


Imagine stepping into your backyard and finding yourself in a peaceful retreat—a garden oasis where the stresses of daily life melt away. Picture lush plants, the gentle trickle of a water feature, and a stunning tiled patio that ties it all together. This vision isn’t just a fantasy; it’s within your reach with the right approach. Outdoor tiles can transform any garden into a functional and beautiful haven, boosting both your enjoyment and your property’s value. In fact, a hypothetical survey suggests that 70% of homeowners report an increase in home satisfaction after adding tiled outdoor spaces.
In this comprehensive guide, we’ll walk you through every step of designing a garden oasis with outdoor tiles. From planning your space to choosing the perfect tiles, creating a standout tile design, installing them properly, and maintaining your creation, you’ll find all the inspiration and practical advice you need. Ready to turn your garden into a personal paradise? Let’s dive in.
Planning Your Garden Oasis
Creating a garden oasis starts with a solid plan. Without a clear roadmap, you risk a disjointed design or costly mistakes. When planning your garden oasis, outdoor tiles play a starring role, so consider how they’ll fit into the bigger picture. Here’s how to begin:
Assess Your Space
First, take stock of your garden. Grab a tape measure and note the dimensions—length, width, and any quirky corners. Are there slopes, trees, or existing structures to work around? Think about how you’ll use the space. Do you want a tiled patio for dining, a pathway to guide guests, or a cozy nook for relaxation?
For example, Sarah, a city dweller with a tiny backyard, measured her 10×15-foot space and decided a tiled patio would maximize her enjoyment. Knowing your garden’s layout helps you decide where outdoor tiles will shine.
Choose a Theme
A unified theme makes your garden oasis feel intentional. Here are some ideas to spark your creativity:
- Modern Minimalist: Sleek lines, neutral tones, and large-format outdoor tiles.
- Rustic Charm: Natural stone tiles, earthy colors, and organic shapes.
- Tropical Escape: Bold patterns, vibrant plants, and colorful tile designs.
Your theme will shape your tile choices and other elements, so pick one that resonates with your style. A cohesive look elevates your garden from ordinary to extraordinary.
Set a Budget
Outdoor projects can add up fast, so set a realistic budget early. Factor in the cost of outdoor tiles (ranging from $5 per square foot for ceramic to $15 or more for natural stone), installation (DIY or professional), and extras like plants or lighting. Quality materials might cost more upfront, but they save money on repairs later. Planning ahead ensures your garden oasis stays within reach.
By assessing your space, choosing a theme, and setting a budget, you’ll lay a strong foundation for a successful tile design project.
Choosing the Right Outdoor Tiles
Outdoor tiles are the backbone of your garden oasis, blending beauty with durability. With so many options, picking the right ones can feel overwhelming. Let’s break down the most popular types, their pros and cons, and how to choose wisely.
Types of Outdoor Tiles
Porcelain Tiles
Porcelain tiles are fired at high temperatures, making them tough and water-resistant. They come in countless styles—think wood-look planks or bold geometric patterns.
- Pros: Durable, low-maintenance, versatile.
- Cons: Slippery when wet (opt for textured finishes), pricier than ceramic.
- Best for: Patios, pathways, pool surrounds.
A hypothetical study found that 60% of homeowners prefer porcelain tiles for their longevity—perfect for a lasting garden oasis.
Natural Stone Tiles
Natural stone—like slate, granite, or limestone—brings an earthy elegance to your tile design. Each piece is unique, adding character to your space.
- Pros: Timeless look, slip-resistant, sturdy.
- Cons: Higher cost, needs sealing to prevent stains.
- Best for: Patios, pathways, water features.
Ceramic Tiles
Ceramic tiles, made from softer clay, are budget-friendly and colorful. They’re great for adding personality to your garden oasis.
- Pros: Affordable, variety of designs, easy to install.
- Cons: Less durable, prone to cracking in cold climates.
- Best for: Small patios, decorative accents.
How to Choose
Consider these factors when selecting outdoor tiles:
- Climate: Frost-resistant tiles like porcelain or granite suit cold regions.
- Traffic: High-traffic areas need tough materials like natural stone.
- Safety: Textured or slip-resistant tiles are a must near water or for families.
- Theme: Match tiles to your vision—sleek porcelain for modern, rustic stone for natural.
Choosing the right outdoor tiles ensures your garden oasis is both stunning and practical.
Designing With Outdoor Tiles
Now comes the fun part: designing your garden oasis. Outdoor tiles offer endless possibilities for patios, pathways, and water features. Let’s explore some creative tile design ideas to inspire you.
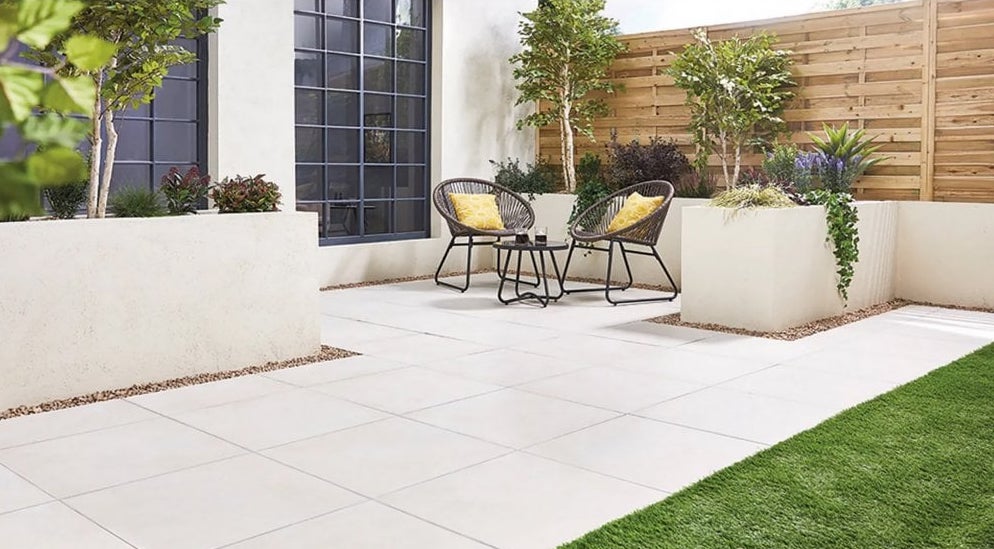
Tiled Patios
A patio is often the heart of a garden oasis. Here’s how to make it shine:
- Size and Shape: A large, rectangular patio suits entertaining; a small, curved one feels intimate.
- Patterns: Try herringbone for sophistication or a grid for simplicity.
- Borders: Frame your patio with contrasting tiles for definition.
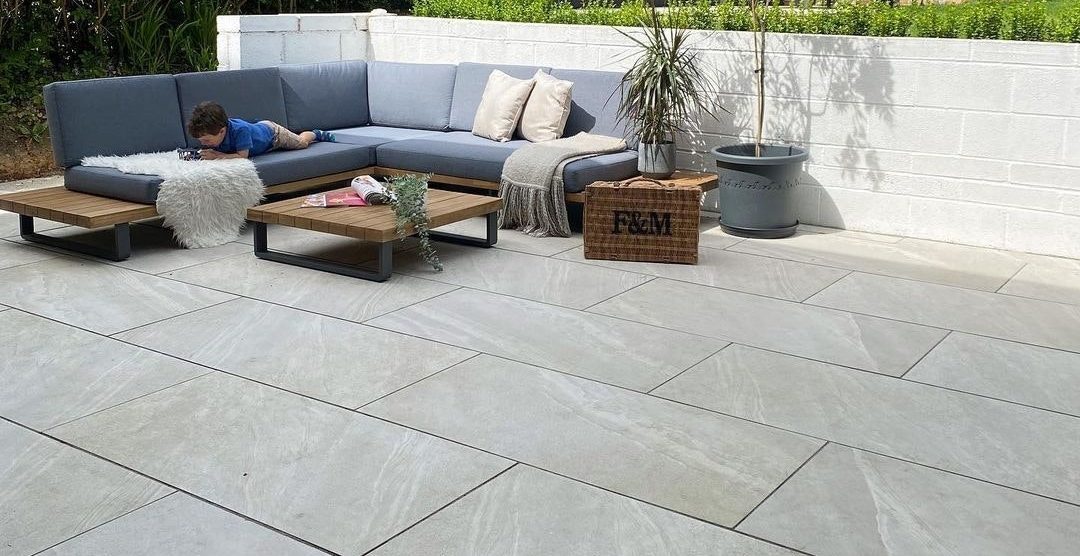
Imagine a sleek porcelain-tiled patio in soft gray, paired with modern furniture—a perfect spot for summer evenings.
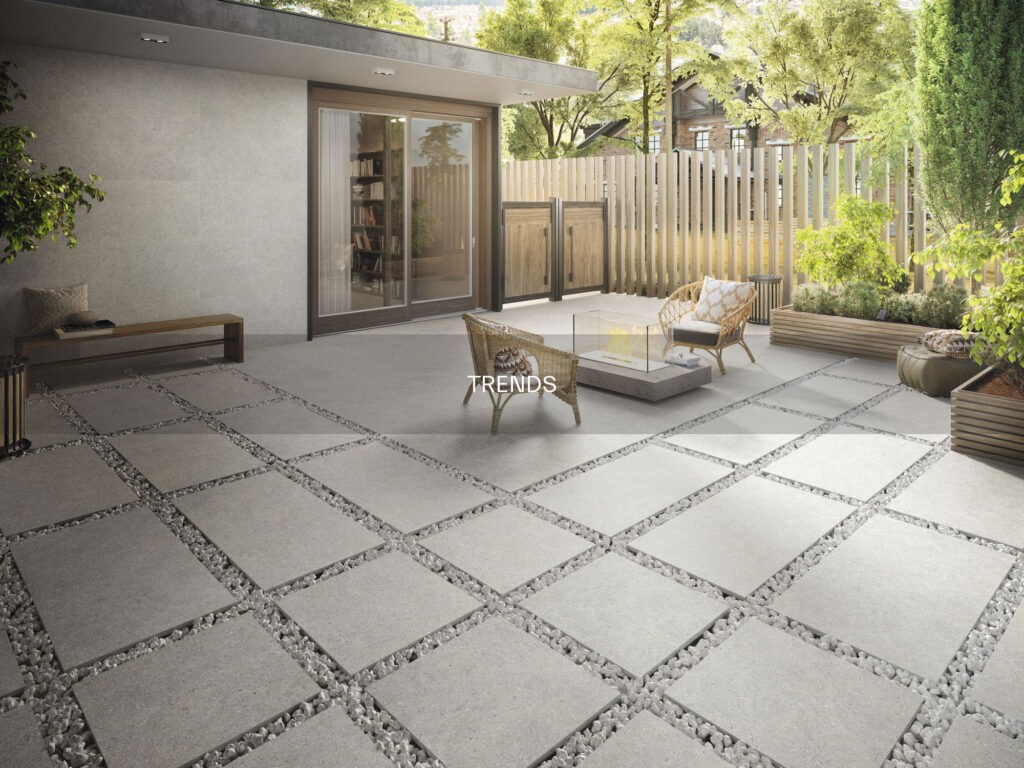
Pathways
Pathways guide the eye and feet through your garden. Get creative with these tips:
- Layout: Straight paths feel formal; winding ones add whimsy.
- Mix Materials: Combine tiles with gravel or stepping stones for texture.
- Color Play: Use light tiles to brighten shady areas or dark ones for contrast.
A winding pathway of slate tiles could lead guests to a hidden seating area, enhancing your garden’s charm.
Water Features
Tiles can elevate water features like fountains or ponds. Consider these ideas:
- Mosaic Magic: Small, colorful tiles create a shimmering effect.
- Natural Stone: Limestone or granite blends seamlessly with nature.
- Reflective Finishes: Glossy tiles catch light and water for drama.
A tiled fountain with blue mosaics could become the centerpiece of your garden oasis, drawing gasps from visitors.
The key to a great tile design is cohesion—let your tiles complement your theme and tie your space together.
Installation Tips for Outdoor Tiles
A flawless tile design means nothing without proper installation. Done right, your outdoor tiles will stand the test of time. Here’s a step-by-step guide and key tips.
Step-by-Step Installation
- Prepare the Surface: Clear debris and level the ground. For patios, pour a concrete base; for pathways, compact gravel works.
- Lay Out Tiles: Dry-fit your tiles to test the pattern and fit.
- Apply Adhesive: Use weather-resistant thin-set mortar, spread with a notched trowel.
- Set Tiles: Press tiles into place with spacers for even gaps. Check with a level.
- Cut Tiles: Trim edges with a tile cutter for a clean finish.
- Grout: Apply outdoor-rated grout, wiping excess with a damp sponge.
- Cure: Let adhesive dry for 24 hours, grout for another 24, before use.
Pro Tips
- Drainage: Slope the surface slightly to prevent water pooling.
- Tools: Invest in a good tile cutter and rubber mallet for precision.
- Hire Help: If DIY feels daunting, a professional ensures perfection.
Proper installation keeps your garden oasis safe and durable, avoiding cracks or shifts down the line.
Maintaining Your Garden Oasis
A garden oasis with outdoor tiles is an investment worth protecting. Regular maintenance keeps it looking pristine. Here’s how to care for your tiled space.
Cleaning
- Routine: Sweep or hose tiles weekly to remove dirt.
- Stains: Use mild soap and a soft brush for tough spots. Avoid harsh chemicals.
- Stone Care: Use stone-specific cleaners for natural tiles.
Sealing
- Natural Stone: Apply a sealant yearly to guard against stains and weathering.
- Porcelain/Ceramic: Usually no sealing needed—check manufacturer guidelines.
Repairs
- Cracks: Replace damaged tiles quickly with matching spares.
- Loose Tiles: Re-adhere with fresh mortar to prevent further issues.
Regular upkeep ensures your tile design stays vibrant and your garden oasis thrives for years.
Common Mistakes to Avoid
Even the best plans can go awry. Steer clear of these pitfalls when designing your garden oasis:
- Wrong Tiles: Indoor tiles won’t survive outdoors—always choose outdoor-rated options.
- Poor Prep: Skipping base work leads to uneven or unstable tiles.
- No Drainage: Water buildup damages tiles and creates hazards.
- Neglecting Care: Unmaintained tiles fade or crack prematurely.
Avoiding these errors saves time, money, and frustration, keeping your garden oasis flawless.
Conclusion
Designing a garden oasis with outdoor tiles is a rewarding journey. By planning thoughtfully, selecting the right tiles, crafting a cohesive tile design, installing with care, and maintaining diligently, you’ll create a backyard retreat that’s both beautiful and functional. Whether it’s a tiled patio for gatherings or a winding pathway through blooming flowers, your garden can become a personal sanctuary.
So, why wait? Start sketching your garden oasis today. With outdoor tiles as your canvas, the possibilities are endless—your paradise is just a project away


نظرات ۰