


In the realm of interior design and flooring aesthetics, tile installation plays a vital role. Whether it’s for your bathroom, kitchen, or living room, tiles offer a blend of functionality and style. An essential aspect of tile installation that often goes unnoticed but significantly impacts the overall look is tile spacing for grout. Let’s delve into why this seemingly minor detail holds substantial importance.
Understanding the Purpose of Tile Spacing
Tile spacing, often done with the use of spacers, serves multiple purposes, each contributing to a well-finished tile installation:
Why you need tiles space?
Tile spacers provide that necessary “wiggle room” or space between tiles to accommodate for the natural expansion, contraction, and slight movement that occurs due to temperature changes, humidity, and the load placed on the tiles.
Here’s a more detailed breakdown:
Temperature Changes: Tiles can expand and contract with temperature fluctuations. This is especially relevant in areas exposed to sunlight or variations in weather conditions. The space provided by spacers helps prevent the tiles from pushing against each other and potentially cracking.
Humidity Changes: Changes in humidity levels can cause materials to expand or contract. Tiles are no exception, and the space provided by spacers allows for this movement without causing damage to the tiles or the overall installation.
Load and Weight: Tiles can experience pressure or weight from various sources such as furniture, foot traffic, or other objects. The space provided by spacers accommodates for any slight movement or shifting that might occur due to this load.
Other reasons like:
۱. Maintaining Tile Size Uniformity
One of the primary reasons for using tile spacers is to ensure that the tiles are spaced uniformly. This prevents any noticeable variations in tile sizes, providing a polished and professional appearance to the flooring.
۲. Addressing Diagonal Variation
Improperly spaced tiles can result in diagonal variations, disrupting the seamless look of the floor or wall. Spacers help to align tiles accurately, eliminating these discrepancies.
۳. Avoiding Bend-Induced Separation
Low-quality tiles often possess bends or uneven surfaces. Inadequate spacing can exacerbate this issue, potentially causing the tiles to separate or create an uneven surface.
۴. Creating the Illusion of Space
Strategic tile spacing is an effective technique to influence the perception of space. More grout lines can create an illusion of a smaller area, whereas horizontal spacers can give the impression of a more expansive space.
۵. Epoxy Usage and Cost-Efficiency
Choosing the appropriate spacer size is also linked to epoxy consumption. For instance, using a 2×۲ ft tile with a 3mm spacer necessitates the least epoxy compared to wider spacers, promoting cost-efficiency.
Types of tiles spacers
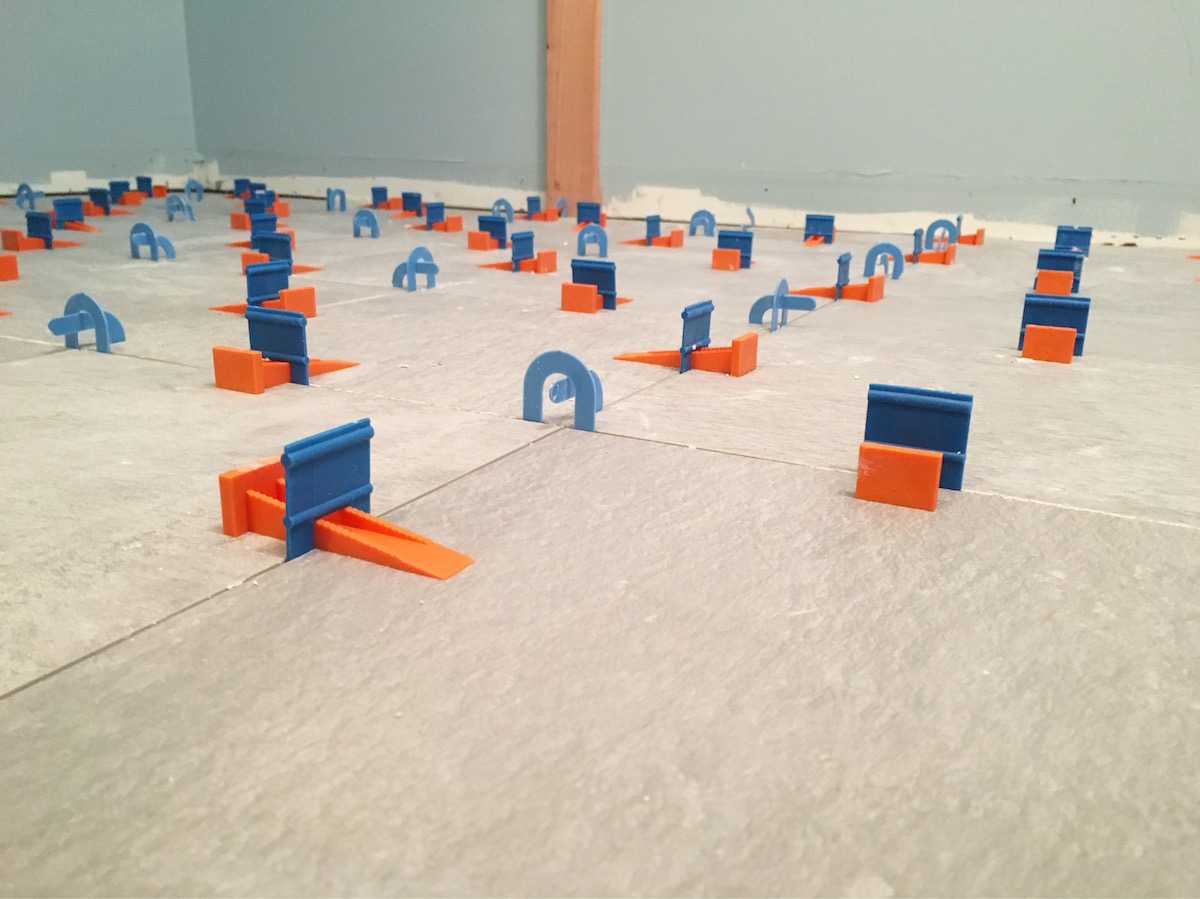
Tile spacers are manufactured in a range of sizes to suit various tiling needs. Common sizes of tile spacers include:
۱ mm Tile Spacers:
Extremely fine spacers used for creating minimal grout lines, suitable for a sleek and modern aesthetic.
۲ mm Tile Spacers:
Ideal for small tiles and achieving a subtle grout line, providing a neat and balanced appearance.
۳ mm Tile Spacers:
Commonly used for standard spacing, suitable for most tile installations, offering a balanced and traditional grout line.
۴ mm Tile Spacers:
Provides a slightly wider grout line, often preferred for a more pronounced separation between tiles.
۵ mm Tile Spacers:
Suitable for larger tiles, offering a noticeable grout line and adding emphasis to the tile pattern.
۶ mm Tile Spacers:
Optimal for larger format tiles, providing a substantial grout line, often chosen for a bold and distinctive look.
۸ mm Tile Spacers:
Used for very large tiles or to create a more prominent grout line, commonly seen in spacious areas.
۱۰ mm Tile Spacers:
Larger spacers suitable for outdoor tiling or installations where a robust grout line is desired.
Optimal Tile Spacing Recommendations
To achieve the desired aesthetics and functionality, here are recommendations for tile spacing based on tile dimensions:
۲×۲ ft Tiles: Optimal with a 3mm spacer, minimizing epoxy usage and maintaining a seamless appearance.
۴×۲ ft Tiles: Ideal with a 4mm spacer, ensuring proper alignment and addressing size variations.
۵mm Spacers for Larger Tiles: Larger tiles, particularly in spacious areas like halls, benefit from a 5mm spacer, enhancing the overall look and feel.
The Rectified vs. Non-Rectified Tiles Dilemma
Considering Spacer Area
Rectified and non-rectified tiles pose a distinct challenge regarding spacer usage. Rectified tiles, precisely cut and dimensionally consistent, permit thinner grout lines. In contrast, non-rectified tiles, due to slight size discrepancies, require slightly wider grout lines for a uniform appearance.
It’s imperative to adapt spacer size accordingly to ensure a seamless and visually appealing tile installation.
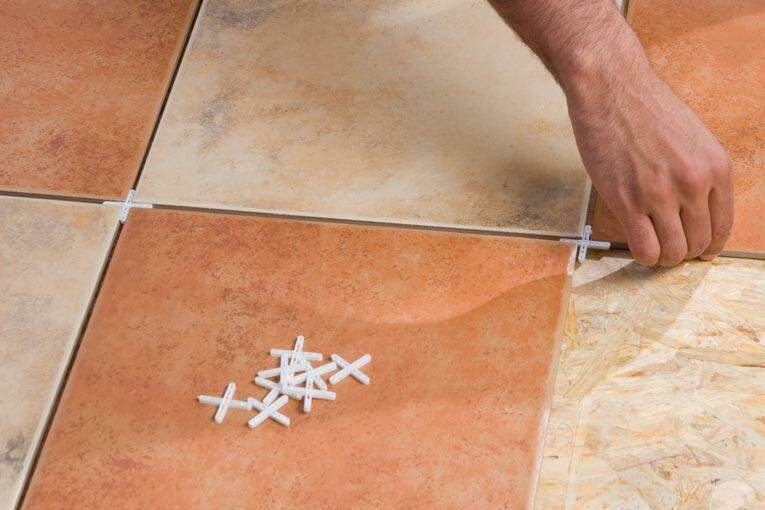
How to install Tiles Spacers:
![]()
Installing tile spacers is a crucial step in achieving a professional and aesthetically pleasing tile installation. Spacers help maintain consistent spacing between tiles, ensuring a uniform and well-aligned appearance. Here’s a step-by-step guide on how to install tile spacers:
Materials and Tools:
Tiles
Tile adhesive or mortar
Trowel
Tile spacers
Level
Rubber mallet
Grout
Steps:
Prepare the Surface: Ensure the surface where you’ll be installing the tiles is clean, dry, and properly prepared. If needed, apply a layer of tile adhesive or mortar to create a suitable base for the tiles.
Determine Tile Layout: Plan the layout of your tiles, ensuring they fit well within the space. Use a level and chalk lines to mark guidelines for the tile installation.
Apply Adhesive or Mortar: Use a trowel to apply tile adhesive or mortar to a small section of the surface. Spread the adhesive evenly, ensuring good coverage and following the manufacturer’s instructions.
Place the First Tile: Gently press the first tile into the adhesive, aligning it with the marked guidelines. Use a slight twisting motion to ensure a good bond with the adhesive.
Insert Tile Spacers: Place tile spacers at each corner of the tile, creating equal gaps between adjacent tiles. The size of the spacer will determine the width of the grout lines.
Continue Tiling: Continue placing tiles and inserting spacers between them. Ensure the tiles are level and aligned according to your planned layout.
Check Alignment: Periodically use a level to check the alignment and adjust the tiles as needed. Tap them gently with a rubber mallet to ensure they are level and evenly spaced.
Remove Excess Adhesive: Wipe off any excess adhesive or mortar that seeps up between the tiles using a damp cloth or sponge. This will help create clean grout lines later.
Complete the Installation: Repeat the process of applying adhesive, placing tiles, and inserting spacers until you have installed all the tiles.
Allow Tiles to Set: Allow the adhesive or mortar to set and cure according to the manufacturer’s instructions before proceeding to grouting.
Grouting: Once the adhesive or mortar has cured, carefully remove the spacers. Mix and apply the grout following the manufacturer’s instructions, filling the gaps between the tiles.
Clean Up: After grouting, clean off excess grout from the tiles using a damp sponge. Allow the grout to cure, then buff the tiles to a clean and polished finish.
Conclusion
In conclusion, the art of tile spacing goes beyond mere functionality. It intricately influences the aesthetics and durability of your tile installation. By choosing the right spacing and spacers based on tile size and type, you can transform your space into a visual masterpiece. So, the next time you embark on a tile installation project, pay careful attention to this often underestimated aspect and witness the difference it can make.


نظرات ۰